backlog of updates: image manipulation and compositing
Back into Photoshop!
Create a still life in photoshop. I started with a picture of a window, a bumpy texture for the table surface, and a dimpled texture to use as the base for the orange. The image was created using effects, adjustment layers, masks and hours and hours of painting.
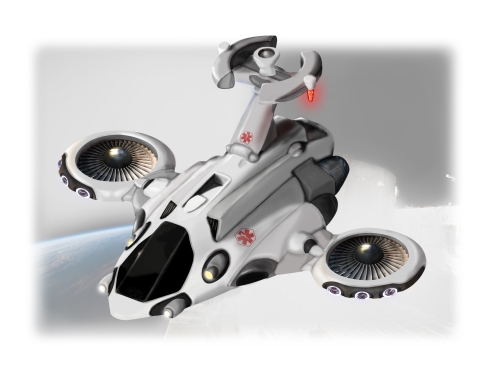
The final project required me to find a black and white concept line art of a fictional vehicle. Using a combination of painting and integrating found images, I created a realistic rendering of what this vehicle might look like. I started off masking out all of the sections of the vehicle and assigning grayscale values to each section. and painting in the details.
Line Art from Free Patents Online:
Final render:
*mic drop*
backlog of updates: intro to photography
So many photos. This is the class where I got to learn to use a big girl camera. I’ll just throw up some highlights.
Project 1: Getting to know the camera
Color contrast: Starte developing that eye; frame pictures with complementary color contrast.
Aperture variation: photograph the same scene and adjust the aperture setting vary the amount of light let in during the exposure.
Project 2: Shutter Speed Variation
Frozen Gesture: capture an action mid gesture
Blurred Action: capture motion over time
Panned Action: move with the action
Light Painting: find a room that can be totally dark and set camera to the longest exposure possible. Use lights to paint in the dark and illuminate isolated objects.
Project 3: Depth of Field
I’m not going to include many of these photos because it is mostly a close up on someones face to manually adjust focus to tip of the nose, eyes, ears, just behind head, 10 ft away, 25 ft away. While he was awesome about helping me, I’m not sure he wants his face plastered online…
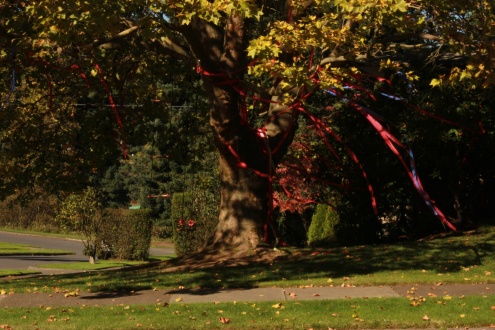
Visual Closure (aka the tree looks like its growing from the disc):
Project 4: Focal Length Variation
Project 5 was a written and sketched assignment to analyze the lighting in advertisements.
Project 6: Lighting
Photograph different kinds of studio lighting (point, diffuse, backlit, transillumination) then find examples, as close as possible, in real world settings. See the PDF… Project6
Project 7: Personal Project
I saw the light painting work of Darius Twin which made me want to try making a gif using light painting and stop motion animation. It was quite an adventure. I must credit my lovely assistant, cousin Lady Kyle. She gave time and space and resources and hands and MacGyver-like troubleshooting. I LOVE YOU, CEE DUBS! We had to capture the smoke at a much faster shutter speed to get movement and definition so I had to layer that in later using adjustment layers in After Effects.It was pretty fun.
backlog of updates: graphic signs and symbols
This class was all about think in terms of a cohesive system. When you go to a website or open an app there are graphics and symbols used to represent different things and can be used as graphic aids to identify area or visually express ideas. Often these symbols are used as navigational buttons, but the main point is that they go together and represent the product.
There was so much work for this class. We had weekly quickdraw assignments where the instructor would give us a topic or system of ideas (like types of play: childlike, adventurous, technical, outdoor, intellectual) and we would have 20 minutes to draw as many different symbol systems as we could (minimum of 5). There was also a weekly requirement to find 20+ images of different kinds of graphics (like geometric, silhouette, pictogram, representational, etc). At the end of the term, we had to design and print a book that included all of the quick sketches, including a vectorized render of our favorite from each set as well as the sketches and final renders of all of the major projects.
The first major assignment was to design the look of a phone app for a grocery delivery service. I had to establish who the target audience of your app is and design towards that demographic. Some of the examples from class: exclusive clientele; young, single guys; busy moms; hipsters.
To start, I had to design a logo for my client and then a system of symbols to use in the app. There were specific symbols required (like checkout) and then a certain number beyond the required, but left up to me on the specifics. Finally, I had to develop the layout and look of the app, including: splash screen, menu and shopping experience.
Logo:
Splash Screen:
Menu:
Shopping:
The next assignment was to create an infographic for milk. I had to describe the process of getting milk from the cow to the store. I also had to include impact to the environment and health.
The final project was to rebrand a local company. I picked Portland Bee Balm. I liked their story and lip balm is cool. Anyway. Process: sketches, refine and vector, refine and final render.
Sketches:
Vector logos:
Final render:
backlog of updates: advanced vfx
There are a lot of little assignments for these VFX classes and most of them are in class exercises, which does not leave a lot of time for perfecting, but we do learn a lot. In any case, here are some highlights.
Week 1: sky replacement. We had to take a clip of people waking across the screen and replace the sky. I also stabilized the shot so there was no camera shake. This was using Nuke for all of the effects and compositing (make sure to watch these on 360p, the lower setting looks like total crap).
Original clip:
Sky Replacement:
Week 6: compositing and motion tracking. In Nuke, I tracked the motion from the clip and exported the data to Cinema 4D. In C4D, I matched a plane to the ground and put a sphere on it textured to roughly match the stone in the clip. I added lights to match the lighting in the clip. Then rendered passes so the C4D camera recorded the sphere to match the footage. Then put renders back into C4D and composite everything together. Whee!
Final Project: This is basically like the Week 6 assignment, but more complicated. I added transparency and reflections into the mix to make these floating alien water cubes fly in formation across the screen. I also darkened everything to make it more moody and creepy.
backlog of updates: sound design 2.0
This was next level sound design to learn more in depth control of ProTools: how to actually create sound effects by recording and layering multiple sound tracks and adding effects. For example, think of the sound light sabers make or Harry Potter casting spells. Those are not things you can go record and pop on a track. You have to decide what that sounds like and build the sound from nothing. It’s actually pretty cool.
One of the most amazing things I learned form taking these sound design classes is that pretty much everything you hear in a film or even on TV was created by the sound department. Very little is captured during production and often what is is not usable. That means everything from the incredible (dragons roaring, which is probably a compilation of animal sounds or even adding something like an engine) to the mundane (footsteps and clothing rustling and picking up keys) was artfully placed to enhance the mood and intent of what we see. Someone decided what we would hear at every moment of this film (in other words, movies that are super heavy on soundtracks either had lazy sound designers or did not expend budget on getting someone to do the job).
Anyway… I actually resurrected an old project, added some new animation and of course created the sound design. Thanks to my badass cousin Lady Kyle and her super cool boyfriend Man Kyle who came in to record the dialogue. They also voiced the dialogue for my intro project as well. FOR SHAME I DID NOT CREDIT THEM BEFORE BECAUSE THEY WERE AWESOME AND GREAT. Also, HUGE thanks to Tracy J. Butler for being totally cool with me jacking the art from her fantastic online comic, Lackadaisy, to create this little slice of fun.


